Thursday, December 20, 2018
Friday, December 14, 2018
Tuesday, December 11, 2018
Thursday, December 6, 2018
Wednesday, December 5, 2018
Tuesday, December 4, 2018
Friday, November 30, 2018
Thursday, November 29, 2018
Wednesday, November 28, 2018
Tuesday, November 27, 2018
Monday, November 26, 2018
Thursday, November 22, 2018
Friday, November 2, 2018
Premiere Pro Project 3
Tuesday, October 30, 2018
Friday Post Oct.26
1.Drop all screenshots in Premiere Pro
2.Make a new sequence
3. Put title screenshots in and make it move slowly bigger
4.Add in the tittle
5. make it move slowly bigger
6.Made their speed/duration longer than intro about 4;29
7. Made some effects to shrink and blur away
8. Copy and paste attribute to the other pictures
9. Background adjust their lengths to cover both pictures in
10. Made them bigger to cover all screen and make them move slowly bigger with the blur
11. Added a song
12. Export to my flies
13. Posted in my blog and complete
Friday, October 26, 2018
Premiere Pro Project 2
Thursday, October 18, 2018
Premiere Pro Project 1
1).I went on the Premiere Pro
2).Added 10 star wars picture from the folder and I drag them into editing bar
3).Change the picture into effect mode
4).I selected the first picture and increase there size along with the other picture too
5).I change into Assembly mode and I selected all the picture and change their speed and size and I also put them in V1 bar
6). I add scale effects to all my picture
7). I play my video to make sure everything is going good so far
8), I added music
9), I added the tittle on the video
10). I Export the video into Onedrive
11). lastly I posted on my blog and I'm finally done
12). I also forgot to add my name in the video XD lol
Monday, October 15, 2018
Friday Post Oct.12
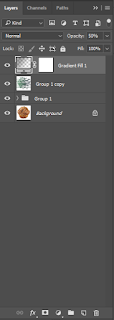
, I also change the colour image and some adjustment from the image and I basically put the muffin inside the mirror by dragging it from the new file to the mirror file and lastly I use the magic eraser to clear out the white stuff from the muffin background.
Friday, October 12, 2018
Tuesday, October 9, 2018
Tuesday, October 2, 2018
Friday, September 28, 2018
Friday post Spet.28
https://x.thunkable.com/copy/6c8b40070e5cb5d5a35024f1925929f3
2 Write a short review thunkable. Explain what it is, what you have done with it and give your opinon
2 Write a short review thunkable. Explain what it is, what you have done with it and give your opinon
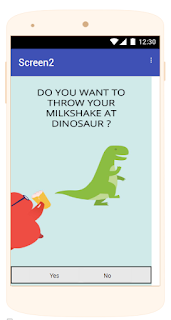
Tunkable is a app making website that you can create a app without any coding language so like you can just by drag an drop.
I've learned a lot about thunkable. It's a good app in fact this is the first time using this to create any apps. It's not that hard but an interesting project, if you are very lazying to go type the website, you can take a short cut by going to thunkable and click on the website you create to go to the website you want. It's helpful when solving computer problems I think :D
Monday, September 24, 2018
Subscribe to:
Comments (Atom)


